
You've probably seen those impressive electronic gadgets and gizmos that seem to do just about anything. And maybe you've wondered, how do they do it? Well, the secret lies in understanding the world of electronics.
If you're a beginner eager to dip your toes into this fascinating field, building your own DIY electronics kit is the perfect place to start. But where do you begin and what do you need?
Stay with me, and we'll guide you through the essential steps and components, equipping you with the knowledge to embark on your own electronics adventure.
Key Takeaways
- Familiarize yourself with common electronic components and their functions.
- Choose components suitable for your skill level and knowledge.
- Use reputable sources to ensure quality and authenticity of components.
- Develop troubleshooting skills to identify and fix electronic issues.
Understanding the Basics
To understand the basics of building a DIY electronics kit, you need to familiarize yourself with common electronic components and their functions.
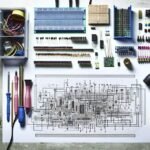
One important aspect of electronics is understanding circuit diagrams and schematic symbols. Circuit diagrams are graphical representations of a circuit's components and their connections. Schematic symbols, on the other hand, are graphical representations of electronic components. You can think of circuit diagrams and schematic symbols as the language of electronics. By learning how to read and interpret them, you can understand how different components interact and form a functioning circuit.
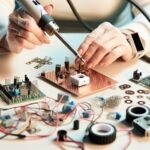
Another crucial skill in DIY electronics is troubleshooting common electronic issues. Sometimes, circuits don't work as intended, and it's important to be able to identify and fix the problem. This can involve using a multimeter to measure voltages and resistances at different points in the circuit, as well as visually inspecting components for any signs of damage or incorrect connections.
Troubleshooting can be a challenging but rewarding part of the DIY electronics experience, as it allows you to gain a deeper understanding of how circuits work and how to overcome obstacles.
Selecting the Essential Components
When selecting the essential components for your DIY electronics kit, consider the specific projects you plan to build and the functions these components will serve. Sourcing components is an important step in creating your kit. You can purchase components from various sources such as online retailers, local electronics stores, or even salvage parts from old devices.
It's crucial to ensure the quality and authenticity of the components you choose, as counterfeit or low-quality components can affect the performance and safety of your projects.
Safety considerations should also be taken into account when selecting components for your kit. Make sure to choose components that are suitable for your skill level and knowledge. For example, if you're a beginner, opt for components that have built-in safety features, such as overcurrent protection or short-circuit protection.
Additionally, consider using components that are compliant with industry standards and regulations to ensure the safety of your projects.
Tools You'll Need
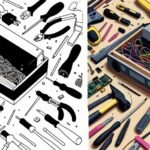
You will need a set of essential tools to successfully build your DIY electronics kit. Understanding the terminology and taking safety precautions while working with electronics is crucial. Let's start with the basics.
Firstly, you'll need a soldering iron. This tool allows you to join electronic components together by melting solder onto the connections. Make sure to choose a soldering iron with adjustable temperature settings for better control.
Next, a set of screwdrivers is essential for opening up electronic devices and tightening or loosening screws. It's recommended to have both Phillips and flathead screwdrivers in various sizes.
A wire stripper is another indispensable tool. It helps you remove the insulation from wires without damaging the conductive material underneath. This is vital for making proper connections in your circuit.
Additionally, a multimeter is a must-have tool for testing and troubleshooting electronic circuits. It allows you to measure voltage, current, and resistance, helping you identify any issues in your circuit.
Lastly, safety goggles and an anti-static wrist strap are important for protecting yourself and your components. Safety goggles shield your eyes from any potential hazards, while an anti-static wrist strap prevents static electricity from damaging sensitive electronic components.
Building Your DIY Electronics Kit
Now that you have acquired the essential tools for working with electronics, let's move on to building your DIY electronics kit. Building your kit involves selecting the right components and organizing them in a way that allows for easy access and efficient troubleshooting.
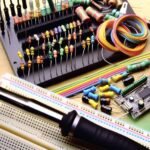
First, let's talk about selecting the components for your kit. Start by considering the projects you plan to work on. Identify the common components used in those projects, such as resistors, capacitors, and LEDs. Purchase these components in bulk to ensure you have an ample supply. Additionally, include a variety of sensors, transistors, and integrated circuits to expand your capabilities.
Next, organize your components in a way that allows for easy access and quick identification. Use small storage containers or compartmentalized boxes to keep your components separate and organized. Label each container or box with the component's name, value, and quantity.
When handling electronic components, it's crucial to take safety precautions. Always work in a well-ventilated area to avoid inhaling harmful fumes. Use appropriate safety gear, such as safety glasses and anti-static wrist straps, to protect yourself and prevent damage to the components. Additionally, ensure that your workspace is clean and free of any liquids or flammable materials.
Exploring Beginner-Friendly Projects
Beginner-friendly projects in electronics offer a great way to apply your newfound knowledge and skills in a practical and hands-on manner. These projects are designed to be approachable for those who are just starting out in the world of electronics. They provide an opportunity to further develop your understanding of basic concepts and build confidence in your abilities.
To get started with beginner-friendly projects, there are a variety of resources available to you. Online tutorials and guides can be incredibly helpful in providing step-by-step instructions and explanations. Websites such as Instructables and Adafruit offer a wealth of beginner-friendly projects with detailed instructions and troubleshooting tips.
When choosing a project, look for ones that align with your interests and goals. Whether it's building a simple LED circuit, creating a basic alarm system, or constructing a small robot, there are plenty of options to choose from.
As you work on these projects, don't be discouraged if you encounter difficulties along the way. Troubleshooting is an important part of the learning process. If something isn't working as expected, take the time to carefully examine your circuit, check your connections, and consult troubleshooting resources. With patience and persistence, you'll overcome any challenges and gain valuable experience in the process.
Related posts:
 How to Choose the Best DIY Electronics Kit for Beginners
 How to Design Your Own DIY Electronics Kit
 How to Turn Your DIY Electronics Kit Into a Functional Device
 Best Ways to Customize Your DIY Electronics Kit
 DIY Electronics Kits Vs. Pre-Built Electronics: Which Is Better?
 Best DIY Electronics Kits for Building Robots