Are you hesitant about building your own DIY electronics kits because you think it's too complicated or time-consuming? Think again.
With this ultimate guide, you'll discover just how accessible and rewarding it can be to create your own electronic devices from scratch.
From understanding the basics of circuits to mastering the essential tools and techniques, this guide will equip you with everything you need to embark on your own electronic DIY journey.
So, whether you're a beginner or a seasoned hobbyist, get ready to unlock the world of DIY electronics and unleash your creativity like never before.
Key Takeaways
- Understanding circuit basics and design principles is essential for building DIY electronics kits.
- Having the right tools, such as a soldering iron, multimeter, and wire cutters, is crucial for successful DIY electronics projects.
- Selecting the right components for your project, whether through purchasing or salvaging, is important for achieving desired voltage and current requirements.
- Building and soldering techniques, including through-hole and surface mount soldering, are necessary skills for creating strong connections in DIY electronics kits.
Understanding Circuit Basics
To understand circuit basics, you need to grasp the fundamental concepts of electrical flow and component behavior. Circuit design principles form the foundation of any electronic project. These principles guide the arrangement of components and the flow of electricity within a circuit. When designing a circuit, you need to consider factors such as voltage, current, and resistance.
Voltage represents the potential energy of the electrical source, while current represents the flow of electrons. Resistance, measured in ohms, determines how easily current can flow through a component.
Understanding the functions of basic electronic components is crucial in circuit design. Resistors, for example, restrict the flow of current in a circuit and are essential for controlling voltage levels. Capacitors store and release electrical energy, helping to smooth out voltage fluctuations. Inductors store energy in a magnetic field and are commonly used in transformers. Diodes allow current to flow in only one direction, which is useful for converting AC to DC. Transistors amplify and switch electronic signals, enabling complex circuit operations.
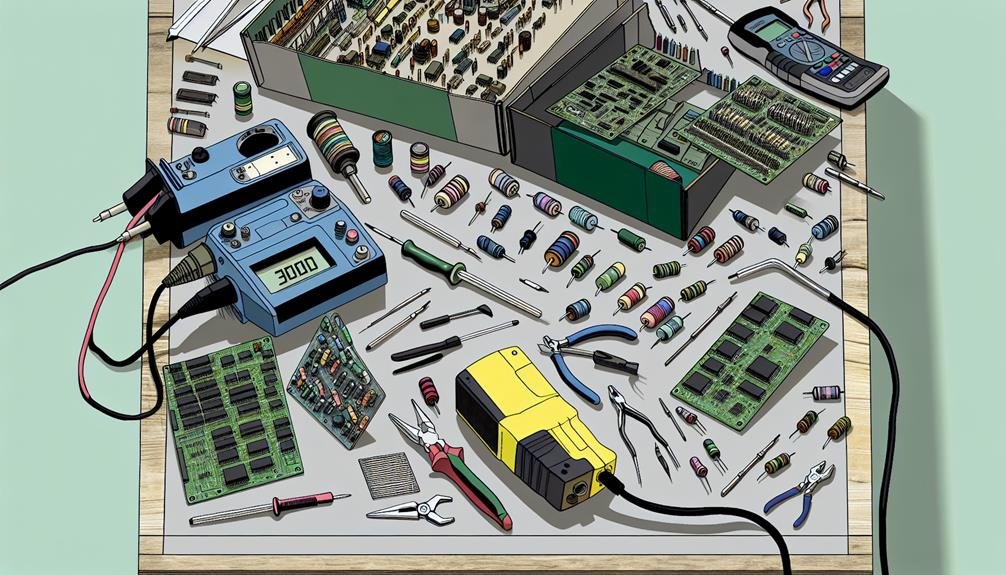
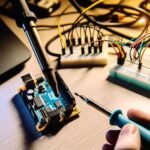
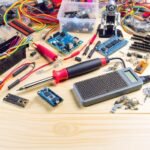
Essential Tools for DIY Electronics
For DIY electronics projects, having the right tools is essential to ensure efficient and accurate assembly of circuits. To get started, you'll need a few basic tools that will allow you to work on various electronics projects.
First and foremost, a good soldering iron is a must-have tool. Look for one with adjustable temperature settings and a fine tip for precise soldering.
Next, you'll need a multimeter, which is used to measure voltage, current, and resistance in a circuit. It's important to understand basic electronics terminology to properly use a multimeter.
Additionally, a set of wire cutters and strippers will come in handy for working with wires. A pair of needle-nose pliers is useful for bending and gripping small components.
Safety precautions should always be taken when working with electronics. It's important to wear safety goggles to protect your eyes from solder splashes and wire clippings. Additionally, working in a well-ventilated area or using a fume extractor is crucial to avoid inhaling harmful fumes from soldering.
Always remember to turn off the power and discharge capacitors before working on any circuit. By having the right tools and following safety precautions, you'll be well-equipped to tackle DIY electronics projects with confidence and freedom.
Selecting the Right Components
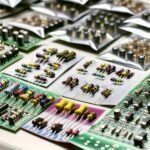
Having the right components is crucial when building DIY electronics kits, as they ensure the proper functionality and performance of the circuits you assemble. When choosing components, it's important to consider the specific requirements of your project. Start by identifying the type of circuit you want to build and the desired specifications such as voltage, current, and frequency. This will help you determine the components needed, such as resistors, capacitors, and transistors.
Sourcing materials is another key aspect of selecting the right components. You have several options when it comes to obtaining the necessary components. One option is to purchase them from online retailers specializing in electronics components. These retailers often offer a wide range of components at competitive prices.
Another option is to salvage components from old electronic devices. This can be a cost-effective way to source materials, but it requires careful dismantling and testing of the salvaged components to ensure their functionality.
Additionally, you can consider joining local electronics clubs or forums where members often share and exchange components.
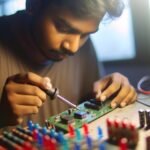
Building and Soldering Techniques
Use a soldering iron to securely join the components together, ensuring a strong and reliable connection. Before you begin soldering, it's important to take safety precautions. Make sure to work in a well-ventilated area and wear safety glasses to protect your eyes from any potential hazards. Additionally, ensure that the soldering iron is properly grounded and always unplug it when not in use to prevent accidental burns or fires.
To achieve professional-looking results, it's essential to master advanced soldering techniques. One such technique is called through-hole soldering. This involves inserting the component leads into the holes on the circuit board and then heating the joint with the soldering iron to melt the solder and create a solid connection. Remember to apply the soldering iron to both the component lead and the copper pad on the circuit board to ensure a proper bond.
Another advanced technique is surface mount soldering. This technique is used for smaller, more compact components that don't have leads. Instead, they've small metal pads on the surface of the circuit board. To solder these components, apply a small amount of solder to the tip of the soldering iron and carefully touch it to the metal pad, allowing the solder to flow and create a secure connection.
Troubleshooting and Testing Your Kit
Now that you have successfully soldered your components using advanced techniques, it's time to move on to troubleshooting and testing your DIY electronics kit. This step is crucial to ensure that your kit functions properly and to identify any common issues that may arise.
Here are some advanced troubleshooting techniques to help you in this process:
- Visual Inspection: Carefully inspect your solder joints and components for any loose connections, bridges, or cold solder joints. Ensure that all components are properly aligned and seated in their respective positions.
- Electrical Testing: Use a multimeter to measure voltages, resistances, and continuity across different points in your circuit. This will help you identify any faulty components or connections.
- Signal Tracing: Follow the signal path through your circuit using an oscilloscope or logic analyzer. This will help you identify any weak or missing signals, which could indicate a problem with a specific component or connection.
- Component Substitution: If you suspect a particular component to be faulty, try substituting it with a known working component to see if the issue persists. This will help you narrow down the cause of the problem.
Related posts:
 Beginner's Guide to Building Circuits With DIY Electronics Kits
 The Ultimate Guide to Smart Home Automation
 Beginner's Guide to Programming With DIY Electronics Kits
 Best DIY Electronics Kits for Building Robots
 DIY Electronics Kits for Building Audio Amplifiers
 DIY Electronics Kits for Building Solar-Powered Gadgets